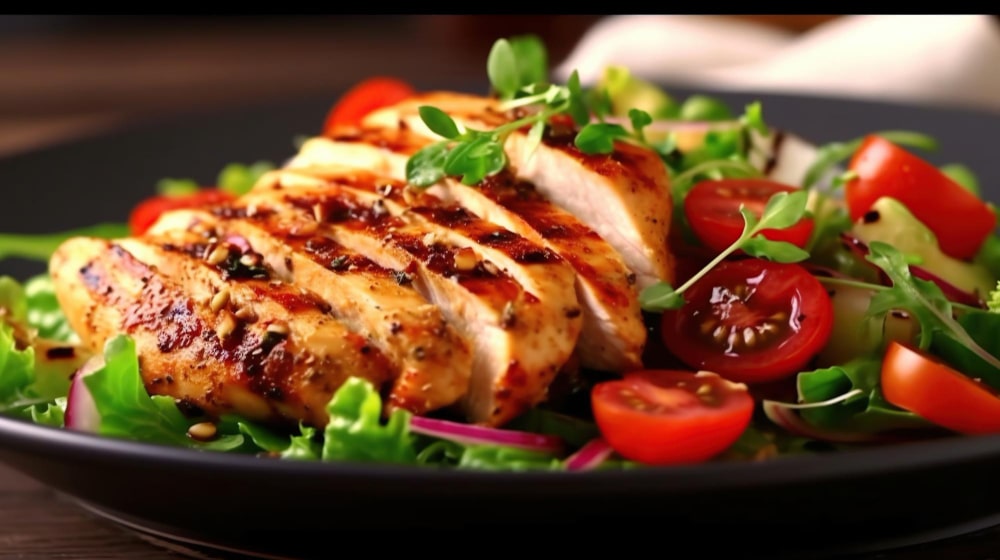
Introduction to Moist and Flavorful Thin Chicken Breasts
Cooking Thin Chicken Breast can often be a culinary challenge. Achieving that perfect balance of moisture and flavor is crucial, especially when dealing with such delicate cuts of meat. In this comprehensive guide, we’ll explore the best methods to ensure your thin chicken breasts remain succulent and delicious, every time.
Understanding the Challenge of Thin Chicken Breasts
Thin chicken breasts are a staple in many kitchens due to their health benefits and versatility. They cook quickly, making them a convenient option for busy weeknights. However, their lean nature poses a significant challenge: they can easily become dry and tough if not cooked properly. The lack of fat means there’s less room for error in the cooking process. The challenge lies in cooking them just enough so they’re safe to eat but still retain their moisture and tenderness.
The Importance of Proper Cooking Techniques
Mastering the art of cooking thin chicken breasts requires an understanding of the right techniques. It’s not just about the cooking method; it’s also about the preparation and handling of the meat before it even hits the pan or oven. Here are some key points to consider, as highlighted by culinary experts:
- Preheating the Oven: This step is crucial for even cooking. Starting with a hot oven helps to sear the outside of the chicken, locking in juices.
- Using a Meat Thermometer: This tool is your best friend when cooking chicken. It takes the guesswork out of determining doneness, ensuring the chicken is cooked through without being overdone.
- Resting the Chicken: Allowing the chicken to rest after cooking lets the juices redistribute throughout the meat, resulting in a more tender and juicy bite.
By following these techniques, you can overcome the common pitfalls of cooking thin chicken breasts. Each step plays a vital role in achieving the perfect outcome: a moist, flavorful, and tender chicken breast.
Best Temperatures for Cooking Thin Chicken Breast
Cooking thin chicken breasts to perfection involves using the right oven temperatures. This not only ensures thorough cooking but also helps in retaining their juiciness and flavor.
Achieving Perfect Results in 15-20 Minutes
For those seeking quick yet delicious meals, thin chicken breasts are ideal. Cooking them at a high temperature for a shorter duration is key. Here’s how to do it:
- Preheat your oven to 425°F (220°C). This high temperature is crucial for quickly sealing in the juices, leading to a moist interior and a slightly crispy exterior.
- Cook the chicken breasts for approximately 15-20 minutes. This duration is typically sufficient for thin cuts. However, the exact time can vary depending on the thickness of the breast and the individual oven.
- Use a meat thermometer to check the internal temperature. The chicken is done when it reaches an internal temperature of 165°F (74°C). This ensures the chicken is safe to eat and still juicy.
Baking at 425°F vs. 350°F: Pros and Cons
The choice of temperature, 425°F or 350°F, can significantly affect the outcome of your dish. Here’s a breakdown of each option:
- 425°F (220°C):
- Pros: Quick cooking time, ideal for a busy schedule. Provides a moist interior with a slightly crispy exterior.
- Cons: Requires more attention to avoid overcooking. Not suitable for thicker cuts or stuffed chicken breasts, as the exterior may burn before the interior is fully cooked.
- 350°F (175°C):
- Pros: Offers more control and a gentler cooking process. Better for cooking larger batches or stuffed chicken breasts.
- Cons: Takes longer, which might not be ideal for those in a hurry.
Monitoring Internal Temperature for Safety and Quality
Regardless of the chosen temperature, using a meat thermometer is essential. This practice, recommended by culinary experts like those at The Kitchn, ensures that the chicken is cooked to the perfect temperature for safety and quality. It’s the most reliable way to check for doneness, taking the guesswork out of cooking and ensuring consistently great results.
Prepping and Slicing Chicken Breasts for Optimal Cooking
Proper preparation and slicing of thin chicken breasts are crucial steps in achieving the best cooking results. These techniques not only ensure even cooking but also enhance the flavor and texture of the chicken.
Steps for Slicing Thin Chicken Breasts
To begin, it’s important to slice the chicken breasts properly. Here’s a step-by-step guide:
- Trimming Fat: Start by removing any excess fat from the chicken breasts. This step is not just about health; it also ensures even cooking and a better texture.
- Flattening the Breast: Place the chicken breast flat on a cutting board. If the breast is uneven in thickness, gently pound it to an even thickness using a meat mallet. This helps in cooking the chicken evenly.
- Slicing Horizontally: Using a sharp knife, carefully slice the breast horizontally. Aim for slices about 1/4 inch thick. Consistent thickness is key for even cooking and preventing parts of the chicken from drying out.
Tips for Even and Safe Slicing
Even and safe slicing is key to perfect cooking. Keep these tips in mind:
- Use a Sharp Knife: A dull knife can slip and increase the risk of injury. A sharp knife makes slicing easier and more precise.
- Steady the Chicken: Hold the chicken firmly with your non-dominant hand (using a fork can help). This control is important for even slices.
- Slice with Confidence: Use confident, decisive strokes for cleaner cuts. Hesitant slicing can lead to uneven thickness.
Marinating for Enhanced Flavor
Marinating thin chicken breasts can significantly enhance their flavor. Consider these points:
- Choosing a Marinade: Select a marinade that complements your dish. This could range from a simple mix of olive oil and lemon juice to more complex marinades involving herbs, spices, and yogurt.
- Timing: Marinate for at least 30 minutes, but not too long. Acidic ingredients in marinades (like vinegar or citrus juice) can start to ‘cook’ the chicken, affecting its texture.
- Refrigeration: Always marinate in the refrigerator, not at room temperature, to keep the chicken safe from bacterial growth.
Marinating not only adds flavor but also helps in tenderizing the chicken, making it juicier after cooking. It’s a simple step that can make a big difference in the final taste and texture of your dish.
5 Essential Tips for Baking Moist Chicken Breasts
Achieving moist and flavorful thin chicken breasts in the oven requires more than just the right temperature. Here are five essential tips to ensure your chicken turns out perfectly every time.
Lower Heat and Longer Cooking
Cooking at a lower temperature for a longer period can be beneficial, especially for thicker cuts:
- 350°F (175°C) is ideal for cooking chicken thoroughly without drying it out. This temperature allows the heat to penetrate to the center of the chicken without overcooking the outside.
- Even Cooking: The lower temperature ensures that the chicken cooks evenly, which is particularly important for maintaining moisture in thin cuts.
- Natural Juices: This method helps the chicken retain its natural juices, making it more succulent and flavorful.
Importance of Not Overcooking
Overcooking is the primary reason for dry chicken. To avoid this:
- Regular Checks: Start checking the chicken a few minutes before the expected finish time. This helps prevent overcooking.
- 165°F (74°C): Remove the chicken from the oven as soon as it reaches this internal temperature. The residual heat will continue to cook the chicken slightly.
- Resting Time: After removing it from the oven, let the chicken rest for a few minutes. This allows the juices to redistribute, preventing them from running out when you cut into the chicken.
Using Olive Oil for Added Moisture
Olive oil is not just for flavor; it also helps in keeping the chicken moist:
- Light Brushing: Before baking, lightly brush the chicken breasts with olive oil. This creates a barrier that helps to lock in moisture.
- Flavor Enhancement: Olive oil also adds a subtle richness to the chicken, enhancing its natural flavors.
- Prevents Sticking: It helps in preventing the chicken from sticking to the baking sheet or pan.
Resting the Chicken Post-Cooking
Allowing the chicken to rest after cooking is a crucial step:
- Rest for 5 Minutes: Let the chicken sit after cooking to allow the juices to settle.
- Retains Moisture: This resting period helps in retaining moisture, making the chicken more tender and juicy.
- Better Flavor: It also allows the flavors to develop more fully, enhancing the overall taste of the chicken.
Balancing Flavor and Moisture
Combining these techniques ensures that your thin chicken breasts are not only flavorful but also perfectly moist. Remember, the key is to balance cooking time, temperature, and preparation methods to achieve the best results. Each element plays a role in the final outcome, and mastering these will lead to consistently delicious chicken dishes.
Keeping Chicken Breast Moist with Brining
Brining is a highly effective method for ensuring your thin chicken breasts remain moist and flavorful. This simple technique involves soaking the chicken in a saltwater solution before cooking, which enhances both the texture and taste of the meat.
How to Make a Simple Brine
Creating a brine is straightforward and requires only basic ingredients:
- Basic Brine Ratio: Mix 1 tablespoon of salt per cup of water. This ratio is a good starting point, but you can adjust according to your taste preferences.
- Flavor Additions: For added flavor, incorporate aromatic herbs and spices like garlic, rosemary, or thyme. Citrus slices, bay leaves, and peppercorns are also popular choices.
- Brining Time: Submerge the chicken breasts in the brine and refrigerate for 20-30 minutes. For thin cuts, a shorter brining time is sufficient. Longer brining times can lead to overly salty meat.
The Benefits of Brining Chicken Breasts
Brining offers several advantages:
- Moisture Retention: The salt in the brine helps the chicken retain moisture during cooking, resulting in juicier meat.
- Flavor Infusion: The brine penetrates the meat, enhancing its natural flavors and adding the subtle notes of any added herbs and spices.
- Tenderness: The brining process can help tenderize the meat, making it softer and more palatable, especially important for lean cuts like chicken breasts.
Customizing Your Brine with Herbs and Spices
To elevate your brining game:
- Experiment with Flavors: Try different combinations of herbs and spices to find what best suits your palate. Each ingredient adds a unique flavor profile to the chicken.
- Citrus Zest and Juices: Adding lemon, lime, or orange zest and juice to the brine can introduce a refreshing citrus note, perfect for summer dishes.
- Sweet Elements: For a touch of sweetness, consider adding a tablespoon of sugar or honey to your brine. This can balance the saltiness and add a subtle complexity to the flavor.
Brining is a simple yet effective way to ensure your thin chicken breasts are always moist and full of flavor. Whether you’re baking, grilling, or pan-frying, this technique can significantly improve the quality of your chicken dishes, making them a hit at any meal.
Frequently Asked Questions
In this section, we address some of the most common queries related to cooking thin chicken breasts. These FAQs are designed to provide quick, helpful insights for both novice and experienced cooks.
Addressing Common Queries and Concerns
- How long should I marinate chicken breasts?
- Ideally, marinate for at least 30 minutes but not more than 12 hours. Over-marinating, especially with acidic ingredients, can lead to a mushy texture.
- Can I brine frozen chicken breasts?
- Yes, you can brine frozen chicken. Allow them to thaw partially in the brine, which adds flavor as they defrost.
- Is it better to bake or pan-fry thin chicken breasts?
- Both methods have their merits. Baking is more hands-off and can be better for larger batches, while pan-frying offers a quicker cook time and a more caramelized exterior.
Expert Answers to Popular Questions
- What’s the best way to ensure even cooking?
- Pound the chicken breasts to an even thickness before cooking. This promotes uniform cooking and prevents drying out.
- How can I add more flavor to my chicken breasts?
- Experiment with different marinades, brines, and spice rubs. Fresh herbs, citrus, and aromatic spices can significantly enhance the flavor.
- How do I know when the chicken is perfectly cooked?
- The safest method is to use a meat thermometer. Chicken is safe to eat when its internal temperature reaches 165°F (74°C).
Final Thoughts and Additional Cooking Tips
In conclusion, mastering the art of cooking thin chicken breasts is about understanding the right techniques and applying them with care. Whether you’re brining, baking, or pan-frying, each step is crucial in ensuring your chicken is moist, flavorful, and perfectly cooked.
- Remember to monitor the temperature carefully and let the chicken rest after cooking.
- Don’t be afraid to experiment with flavors through marinating and brining.
- Most importantly, enjoy the process and the delicious results of your efforts.
Cooking thin chicken breasts doesn’t have to be daunting. With these tips and techniques, you’re well on your way to creating mouth-watering dishes that are sure to impress. For more insights on cooking techniques and recipes, explore our guide on Delicious Thin Chicken Breast Recipes for Quick Healthy Meals.


